
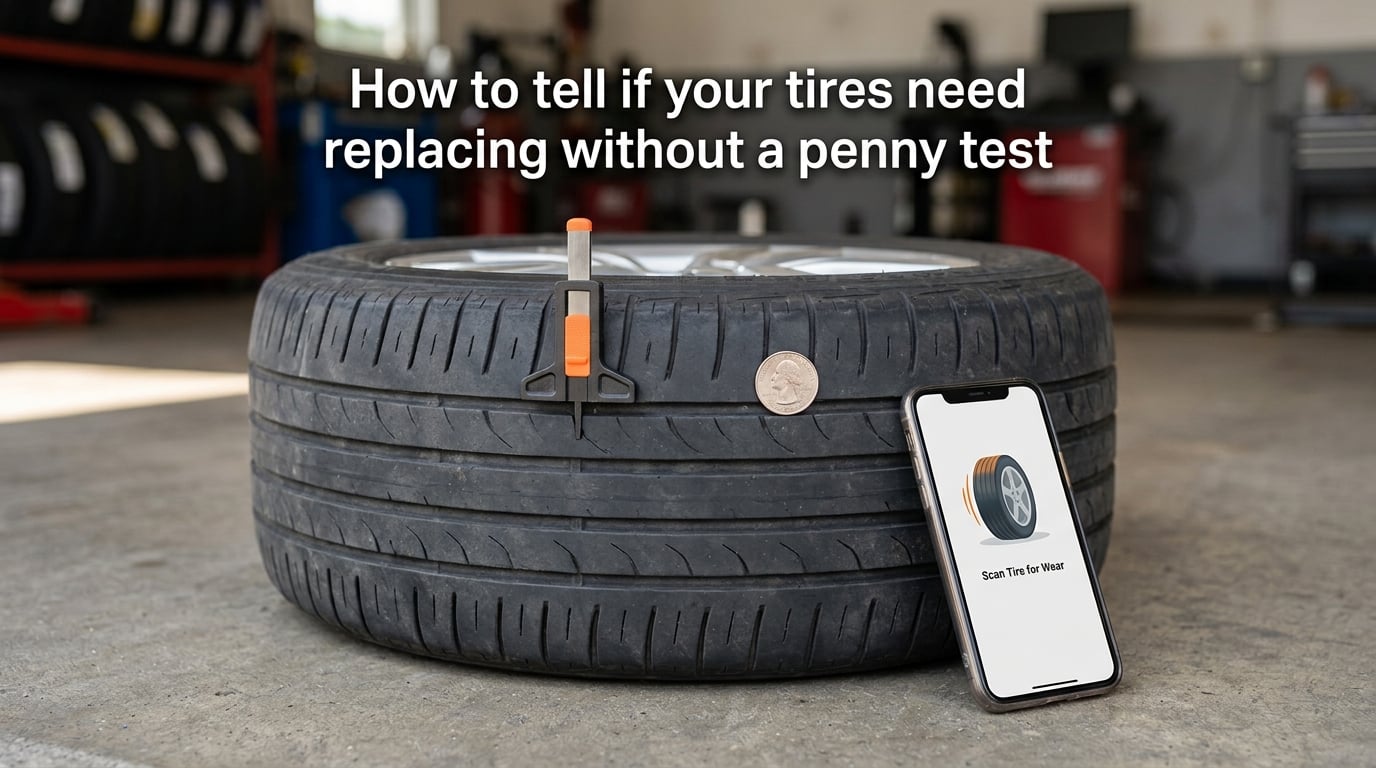
The penny test has been the go-to tire check for decades, but it only tells you one thing: whether your tread has dropped below 2/32 inch. That single data point misses the early warning signs that could save you from a hydroplaning incident or a sidewall blowout on the highway.
I’ll walk you through how to tell if your tires need replacing without a penny test, using methods our team has tested across thousands of miles of driving. You’ll learn the visual techniques mechanics actually rely on, the measurement tools worth buying, and the smartphone options that turn your camera into a tread gauge.
Table of Contents
What Are Tread Wear Bars and Why They Replace the Penny Test
Tread wear bars (also called tread wear indicators) are small raised bridges that sit at the bottom of your tire’s main grooves, running perpendicular to the direction of travel. Every passenger tire manufactured after 1980 has them, and they’re the single most reliable no-tool method for knowing when it’s time to replace your tires.
When your tread wears down until it’s flush with these bars, you have exactly 2/32 inch of tread left. At that depth, your tires are legally worn out in most U.S. states, and your stopping distance on wet pavement has stretched significantly. The bars are designed to appear right at the moment replacement becomes urgent, not before, so seeing them means “replace now,” not “replace soon.”
Where to Find Tread Wear Bars on Your Tires
Look at the main circumferential grooves (the deep channels that run around the tire). About two-thirds of the way down each groove, you’ll see a thin horizontal bar connecting the two sides. On light-colored tires they’re easy to spot. On darker tires, run your fingernail across the groove. You’ll feel a slight bump where the bar sits.
Check all four tires, and check multiple points around each tire. Tires don’t wear evenly. The bars may be exposed at one spot but still have usable tread 12 inches away on the same tire.
What Wear Bars Look Like at Different Wear Stages
When your tread is well above the bars, you’ll see deep grooves with the bars sitting invisibly at the bottom. As wear progresses, the bars rise closer to the surface of the surrounding tread. When the bar is even with the tread block surface, your tire is at 2/32 inch and ready for replacement. According to forum discussions on r/cars and r/tires, many drivers miss this step because they don’t know the bars are even there.
How to Use a Tread Depth Gauge for Accurate Measurement
A tread depth gauge costs between 3 and 15 dollars and gives you measurements to the nearest 1/32 inch. For drivers who want precision without a trip to the tire shop, this is the tool our mechanics recommend.
Step-by-Step Tread Depth Gauge Instructions
Step 1: Push the gauge’s barrel into the tread groove until the shoulders of the gauge sit flush against the tread blocks on either side. The measuring pin should be touching the bottom of the groove.
Step 2: Read the measurement on the side of the gauge. Most gauges measure in 1/32 inch increments. If you’re using a digital gauge, the reading appears on the screen.
Step 3: Repeat at three locations on each tire: the center, the inner shoulder, and the outer shoulder. Record each measurement.
Step 4: Compare the lowest reading against the safety thresholds in the table below. If any reading hits 2/32 inch, replace the tire immediately. If any reading is significantly different from the others on the same tire, you have an alignment or suspension problem worth investigating.
Where to Place the Gauge for the Most Accurate Reading
Always measure in the main circumferential grooves, not the small sipes or lateral slots. The main grooves carry the wear bars and represent the tire’s true water-evacuation capacity. Measure at the center of the tread and at both edges, since edge wear often signals underinflation while center wear signals overinflation.
The Quarter Test as a Penny Test Alternative
If you want a coin-based test that’s more accurate than the penny test, the quarter method gives you a better safety threshold. A quarter’s edge measures about 4/32 inch from the tip to Washington’s head, so it tells you whether your tread is above or below the safer wet-weather threshold rather than the absolute bald threshold.
How to Perform the Quarter Test
Step 1: Insert a quarter into the tread groove with Washington’s head pointing down into the groove.
Step 2: If you can see the top of Washington’s head above the tread, your tread is below 4/32 inch. That’s the threshold where wet-weather performance drops sharply, and it’s time to start shopping for replacements.
Step 3: If Washington’s head is fully covered by the tread, you have at least 4/32 inch remaining. That gives you reasonable wet-weather traction but doesn’t tell you the full picture.
Reviewers on r/cars note that the quarter test catches the problem earlier than the penny test, but it still won’t reveal uneven wear patterns or sidewall damage. Use it as one signal among several, not the final word.
Phone App Tread Scanning Methods
Zero of our top competitors cover phone-based tread scanning, but it’s a real option worth knowing about. Several apps use your phone’s camera to estimate tread depth by analyzing a coin-sized reference object pressed against the tire surface.
How Phone Tread Scanning Works
The apps (Tread Tire Tread Depth Calculator and Tire Size Calculator are the most popular on iOS and Android) ask you to place a coin flat against the tread, photograph it, and then analyze the relative size of the coin versus the surrounding tread blocks. Because the coin’s diameter is a known constant, the app can estimate how much of the coin is “above” the tread, which correlates to tread depth.
Accuracy Limitations of Phone Apps
Phone scanning is best treated as a screening tool rather than a precision instrument. Lighting conditions, camera angle, and tire color all affect results. Users on r/cars who’ve tested these apps report accuracy within about 1/32 inch when conditions are good, but errors can reach 2/32 inch in poor lighting or when scanning dark tires. For a quick check, they’re handy. For a final replacement decision, stick with a physical gauge.
Sidewall Damage Inspection: Bulges, Cracks, and Dry Rot
Tread depth tells you how much rubber you have left. Sidewall condition tells you whether the tire is structurally sound. A tire can have 8/32 inch of brand-new tread and still be dangerous if the sidewall is compromised.
Bulges and Bubbles
Run your hand along both sidewalls of each tire, feeling for any raised bumps or soft spots. A bulge usually means the internal belt has separated from the carcass, often from hitting a pothole or curb. A bulging tire can fail without warning at highway speeds. Replace it immediately, regardless of tread depth.
Cracks and Dry Rot
Look for fine cracks running along the sidewall or between tread blocks. Tire rubber contains antioxidants that prevent the rubber from breaking down, but those chemicals evaporate over time. Dry rot appears as a network of small cracks, often described as looking like dry skin. Once cracking is visible, the tire’s structural integrity is compromised. Tires showing significant dry rot need replacement even if the tread is still deep.
Sidewall damage is the kind of problem tire shops flag during routine inspections. If you’ve ever had a shop insist on replacement when the tread looked fine, sidewall damage was likely the reason.
How to Read Your Tire Age with the DOT Code
Tires degrade with age even when they’re not being used. The DOT code stamped on every tire’s sidewall tells you when it was manufactured, and that date matters more than mileage for stored or lightly-driven vehicles.
Locating the DOT Code
Look on the sidewall for a marking that starts with “DOT” followed by a series of letters and numbers. The last four digits are the date code. Before 2000, the date code used three digits. After 2000, it’s four digits in the format “WWYY” (week and year).
Reading the Date Code
For example, “DOT XXXXXXX2219” means the tire was manufactured in the 22nd week of 2019. After the year 2000, the last four digits are the production date. If your tire shows “1518,” it was made in the 15th week of 2018.
When Age Alone Justifies Replacement
Most tire manufacturers recommend replacement after 6 to 10 years regardless of tread depth. The rubber compounds harden over time, reducing grip even on tires that look brand new. The National Highway Traffic Safety Administration recommends replacing tires older than 6 years, and many manufacturers void their warranties after that point. If your tires are more than 6 years old and you can’t confirm the manufacture date, take them to a tire shop for inspection.
Uneven Wear Patterns and What They Tell You
Uneven wear is one of the most valuable diagnostic signals your tires give you. Different wear patterns point to specific mechanical problems, and catching them early can save you hundreds in suspension work.
Center Wear
If the center of your tread wears faster than the edges, your tires are likely overinflated. Excess pressure pushes the tread contact patch toward the center. Check your door-jamb sticker for the correct pressure and let some air out.
Edge Wear (Both Sides)
If both shoulders wear faster than the center, your tires are underinflated. The tire rolls on its outer edges, scrubbing rubber off the shoulders. This is the most common wear pattern and the easiest to prevent with monthly pressure checks.
One-Sided Edge Wear
Wear concentrated on one edge of the tire usually points to alignment problems, most commonly camber misalignment. If the inner or outer edge wears much faster than the opposite side, get an alignment check.
Cupping or Scalloping
If your tread has a series of dips or cups worn into it, you likely have a suspension problem. Worn shocks, struts, or bushings cause the tire to bounce unevenly, creating a wavy wear pattern. Replace the worn suspension components and rotate or replace the affected tires.
Forum users on r/AskMechanics repeatedly emphasize that uneven wear patterns are often caught first by physically running your hand across the tread. A smooth, even sweep tells you a lot. Anything that feels lumpy, feathered, or stepped means it’s time for a closer look.
Tread Depth Safety Thresholds by Driving Condition
The 2/32 inch legal minimum applies everywhere in the United States, but the safe minimum depends entirely on how and where you drive. A driver in dry Arizona can get away with 3/32 inch. A driver in snowy Minnesota wants at least 6/32 inch. Here’s how the thresholds break down by condition.
| Driving Condition | Minimum Tread Depth | Why This Threshold |
|---|---|---|
| Dry pavement only | 2/32 inch | Legal minimum; adequate grip on dry roads |
| Wet roads (rain) | 4/32 inch | Tread grooves evacuate water; below 4/32, hydroplaning risk rises sharply |
| Light snow | 5/32 inch | Tread blocks need depth to bite into snow |
| Heavy snow / winter driving | 6/32 inch | Industry consensus for safe winter traction |
| Off-road / gravel | 6/32 inch or more | Sidewall and tread protection needed |
Notice that 2/32 inch is the legal floor, not the safety recommendation. Mechanics across forums consistently recommend replacing tires at 4/32 inch if you drive in any weather that includes rain, and at 6/32 inch if you face real winter conditions.
Tire Maintenance Tips to Extend Tire Life
Replacing tires is expensive, and the best way to delay that bill is to take care of the ones you have. Our team has compiled the maintenance practices that consistently add years and thousands of miles to tire life.
Check Tire Pressure Monthly
Underinflation causes edge wear, reduces fuel economy, and increases blowout risk. Check your tire pressure at least once a month, and always check it when the tires are cold (driven less than a mile or rested for three hours). The pressure listed on your door-jamb sticker is the cold-inflation target, not the number on the tire sidewall.
Rotate Every 5,000 to 7,500 Miles
Front and rear tires wear at different rates depending on your drivetrain. Front tires on front-wheel-drive cars carry more weight and steering load, so they wear faster. Rotating your tires every 5,000 to 7,500 miles evens out the wear and lets you reach the full mileage potential of the tread. Many drivers tie rotation to oil change intervals.
Get an Alignment After Major Impacts
If you hit a curb, pothole, or any object hard enough to feel it, get an alignment check. Even small alignment deviations cause uneven wear that can destroy a tire in 10,000 miles. Alignment checks typically cost 50 to 100 dollars and can save you hundreds in premature tire replacement.
Watch Your Driving Habits
Hard acceleration, late braking, and fast cornering all accelerate wear. Smooth driving habits can add 20 percent or more to tire life. Avoiding curbs, potholes, and debris protects both the tread and the sidewall structure.
Store Tires Properly If You Swap Seasonal Sets
If you run winter and summer tires, store the off-season set in a cool, dry place away from direct sunlight. Stack them horizontally if unmounted, or hang them if mounted on wheels. Heat and UV exposure accelerate the chemical breakdown that leads to dry rot.
Frequently Asked Questions
How many years do tires usually last?
Most tires last between 3 and 6 years, depending on driving conditions, climate, and maintenance. The National Highway Traffic Safety Administration recommends replacing tires older than 6 years regardless of tread depth, and most manufacturers void warranties after that point. Even tires with deep tread lose grip as the rubber compounds harden with age.
How can I tell if my tires really need to be replaced?
Use a combination of methods rather than relying on one: check tread wear bars (replace when flush with tread), measure with a tread depth gauge (replace at 2/32 inch), inspect the sidewalls for bulges or cracks, read the DOT code for age (replace after 6 years), and look for uneven wear patterns. If any single signal says replace, the answer is replace.
My tires only lasted 2 years. Is this normal?
A 2-year tire life is shorter than average but not unheard of. Causes include aggressive driving habits, chronic underinflation, missed rotations, hard braking, or driving on rough roads. If your tires are wearing out that fast, check your alignment, suspension components, and tire pressure monthly. You should expect closer to 4 to 6 years from a typical set.
How to check tire tread without a penny?
Look for the tread wear bars at the bottom of the main grooves. When the tread wears down until it’s flush with these raised bars, you have 2/32 inch left and need new tires. For more precision, use a tread depth gauge, perform the quarter test, or try a phone app that estimates depth by photographing a reference coin on the tire.
What is the 3 rule for tires?
The 3 rule (sometimes called the 3/32 rule) means replacing tires when tread depth drops below 3/32 inch. While 2/32 inch is the legal minimum, traction in wet conditions drops sharply once you cross 3/32 inch, so many mechanics recommend replacement at this higher threshold for drivers who face regular rain.
What is the 7 7 rule for tires?
The 7 7 rule refers to replacing tires after 7 years of service regardless of tread depth, or after 7/32 inch of wear, whichever comes first. This is a conservative safety guideline sometimes used for vehicles that carry heavy loads or drive in harsh conditions. Most manufacturers recommend replacement by year 6 for average drivers.
How to check tire depth without a penny?
Use a tread depth gauge for the most accurate measurement, available at any auto parts store for under 15 dollars. Press the gauge into the tread groove and read the depth in 1/32 inch increments. As an alternative, look for tread wear bars or perform the quarter test, which uses a quarter instead of a penny to detect tread loss earlier.
Are tread wear indicators accurate?
Tread wear indicators are accurate for the specific threshold they’re designed to mark: 2/32 inch. They tell you exactly when you’ve reached the legal minimum and nothing earlier. If you want to replace tires before they’re bald (recommended for wet weather), you need a tread depth gauge to detect tread between 2/32 and 6/32 inch.
What is the easiest way to check tire tread depth?
The easiest no-tool method is the tread wear bar check. Look into the main grooves of your tire and find the small horizontal bar at the bottom. If the bar is even with the surrounding tread, your tires are at 2/32 inch and ready for replacement. For the easiest tool-based method, use a tread depth gauge, which gives a precise reading in seconds.
How many 32nds is a penny?
A penny’s edge measures about 2/32 inch from the table to the top of Lincoln’s head. When you insert a penny into a tread groove with Lincoln’s head down, if you can see the top of his head above the tread, your tread is below 2/32 inch. This is why the penny test detects bald tires but misses the safer earlier-replacement thresholds.
The Bottom Line on Penny-Test-Free Tire Inspection
Knowing how to tell if your tires need replacing without a penny test gives you a much richer picture of tire health than any single coin-based check. Tread wear bars, depth gauges, the quarter test, phone apps, sidewall inspection, DOT code reading, and wear pattern analysis together catch problems the penny test simply can’t see. Run through these checks monthly, and you’ll spot replacement needs early, before wet-weather traction collapses or a sidewall bulge strands you on the shoulder.