
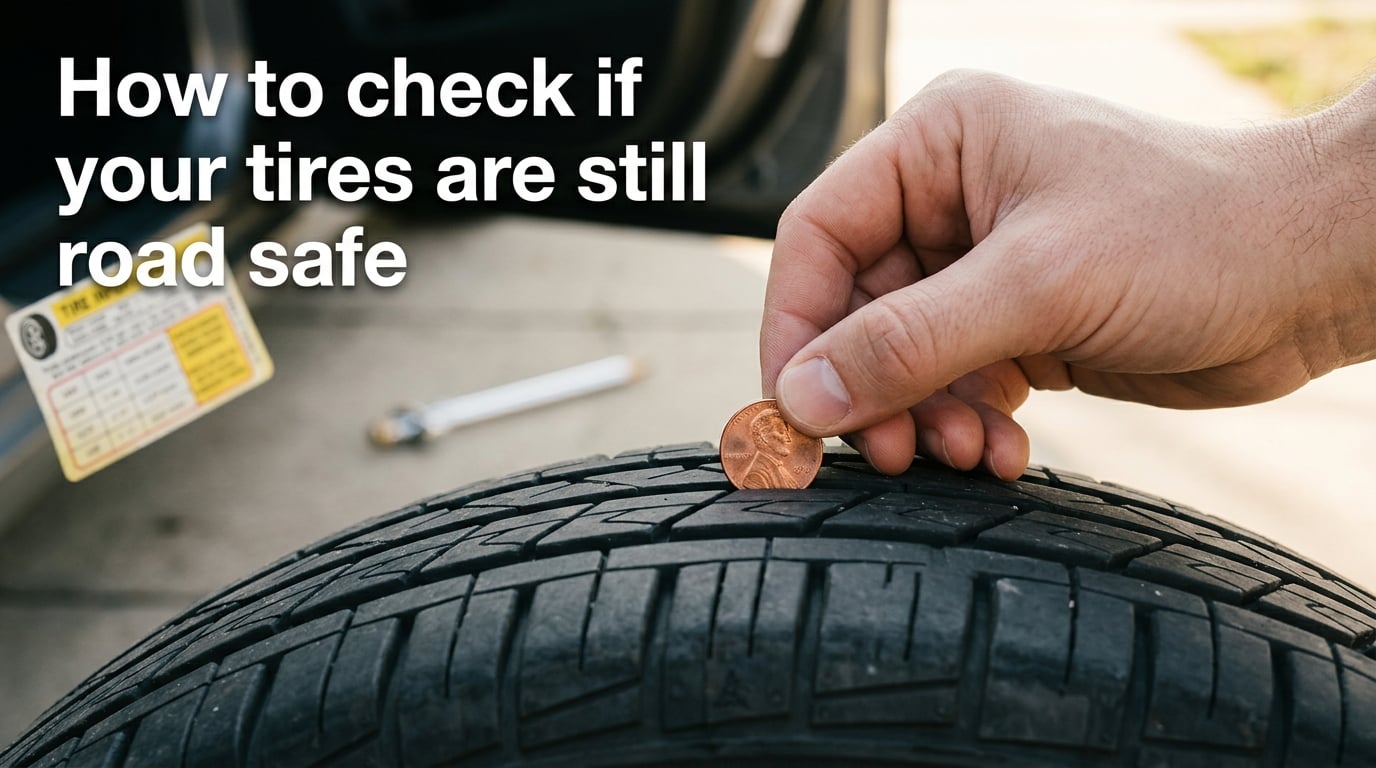
To check if your tires are still road safe, you need to run four quick inspections: measure tread depth with the penny test (replace at 2/32 inch), verify tire pressure against your door-jamb placard on cold tires, scan the sidewalls for bulges and cracks, and read the DOT date code so you know the tire’s age. I run this full check once a month on my own vehicles, and it takes about ten minutes from start to finish.
Tires are the only thing connecting your car to the road, and most tire-related crashes come from problems a driver could have caught early. In this guide, I’ll walk you through every check our team uses, including a few (like spare tire age and post-curb-hit inspection) that almost no one talks about.
Table of Contents
What Does ‘Road Safe’ Actually Mean for a Tire
A tire is “road safe” when it passes four physical checks: tread depth of at least 2/32 inch (the legal minimum in most U.S. states), proper inflation to the manufacturer’s recommended PSI, no sidewall damage such as bulges or deep cracks, and age under 10 years from the manufacture date printed on the sidewall.
The legal minimum is not the same as the safe minimum, and that’s where most drivers get tripped up. A tire at exactly 2/32 inch is technically legal but performs poorly in wet weather, where 4/32 inch is the real safety threshold.
Here is the quick-reference table I keep taped inside my garage door:
- 10/32 to 11/32 inch – New tire depth. Full performance, normal wet and dry grip.
- 6/32 to 9/32 inch – Plenty of usable tread. No action needed.
- 4/32 to 5/32 inch – Plan replacement soon, especially if you drive in rain or snow.
- 2/32 to 3/32 inch – At the legal minimum. Replace immediately for wet-weather driving.
- Below 2/32 inch – Illegal in most states and unsafe in any condition.
NHTSA data consistently attributes thousands of crashes each year to tire-related issues, and the four checks below cover the vast majority of those causes.
How to Check Tread Depth with the Penny Test
The penny test is the fastest at-home way to estimate tread depth: insert a penny into the main tread groove with Lincoln’s head pointing down, and if you can see the top of his head, your tread is below 2/32 inch and the tire needs replacement.
I taught this to my neighbor last weekend using a brand-new spare tire and one worn down to 3/32 inch – the difference was instantly obvious. Here is the exact 3-step procedure:
- Find the main tread groove. Look at the tire head-on and locate the deepest central channel that runs around the circumference. Avoid the small tread blocks on the shoulder – those wear differently and will give a false reading.
- Insert the penny head-first. Place a U.S. penny into that main groove with Abraham Lincoln’s head pointing toward the tire, then slide it in until the rubber grips.
- Read the result. If any space remains above Lincoln’s head, your tread is above 2/32 inch. If you can see the top of his head clearly, the tire has worn to the legal minimum and should be replaced.
Repeat the penny test in at least three spots across each tire – inner edge, center, and outer edge. If one area reads much lower than the others, you likely have an alignment or inflation problem, not just worn tires.
The Quarter Test for Wet Weather Safety
The quarter test checks whether your tread is above the 4/32 inch wet-weather safety threshold: insert a quarter into the main groove with George Washington’s head pointing down, and if the top of his head is visible, your tires are below the safe depth for rain and need replacement soon.
Wet stopping distance increases sharply once tread drops below 4/32 inch because the grooves can no longer evacuate water fast enough to prevent hydroplaning. The quarter test gives you a 2/32 inch margin over the legal penny test, which is exactly where most safety experts draw the line for wet-weather drivers.
Repeat the same 3-spot check (inner, center, outer) with a quarter. If Washington’s head shows anywhere on the tire, schedule replacement before the next forecasted rainstorm.
How to Check Tire Pressure the Right Way
To check tire pressure accurately, measure the tires when they are cold (driven less than a mile or parked for 3+ hours), compare the reading to the PSI on your door-jamb placard (not the number on the tire sidewall), and add air if any tire is more than 3 PSI below the recommendation.
The number molded into your tire’s sidewall is the maximum pressure, not the target pressure. The correct number for your specific vehicle is on a yellow sticker inside the driver-side door jamb, or in the owner’s manual.
Here is the procedure I use every month:
- Park for at least 3 hours or drive less than a mile so the tires are cold. Driving heats up the air inside and artificially raises the reading by 3-5 PSI.
- Remove the valve cap and press a digital or dial gauge firmly onto the valve stem for a brief moment.
- Read the PSI and compare to the placard on your door jamb, not the sidewall maximum.
- Check all four tires plus the spare. Pressure should be within 1-2 PSI across all corners; a big difference signals a slow leak.
- Add or release air as needed and recheck. Replace the valve caps when done – they keep dirt out of the stem.
- Reset the TPMS light if your vehicle has one. Most cars relearn automatically after a few miles of driving.
If your TPMS warning light is on, at least one tire is more than 25% below the recommended pressure. Don’t ignore it – the system is designed to alert you before the tire becomes a blowout risk.
Visual Sidewall Inspection: Bulges, Cracks, and Dry Rot
A safe sidewall is smooth and uniformly black with no bulges, deep cracks, foreign objects, or raised bands of cracked rubber (dry rot). Run your hand along the entire sidewall of each tire and look carefully at any spot that feels uneven, soft, or visually different.
Sidewalls take more abuse than treads because they flex with every bump and curb. A bulge means the internal cords have broken and the tire can fail at highway speed, even if the tread looks fine. Mechanics on r/AskMechanics consistently warn that bulges can appear weeks after a curb hit, so check again if you’ve hit anything recently.
Here is the sidewall checklist I run through:
- Bulges or blisters. Soft raised spots mean internal cord damage. Replace the tire immediately – this is not repairable.
- Deep cracks or cuts. Surface hairline cracks are normal aging; cracks deep enough to expose cord fabric are not.
- Dry rot. A network of small cracks across the sidewall surface, often on vehicles parked outside. Common after 6-7 years regardless of mileage.
- Embedded objects. Nails, screws, or glass can be lodged without causing an immediate flat. Look for any spot that doesn’t match the surrounding rubber.
- Irregular bead seating. The tire’s edge should sit evenly against the wheel. A visible gap means the tire is unseated – do not drive on it.
If you spot any of these on a single tire, replace that tire as a pair with the same axle. Replacing only one front tire on a front-wheel-drive vehicle creates an handling imbalance.
How to Read the DOT Date Code and Tire Age
The DOT date code is a 4-digit number stamped on the tire’s sidewall: the first two digits are the week of manufacture and the last two are the year, so “2319” means the tire was made in the 23rd week of 2019. Most tire manufacturers recommend replacement at 10 years from that date, even if the tread still looks fine.
Rubber degrades with age from heat, UV, and ozone exposure – a tire can look perfect on the outside and still have hardened, brittle rubber that loses grip and is prone to sudden failure. NHTSA suggests replacement at 6 years; most manufacturers use 10 years as the outside limit. I treat 6 years as the “start watching” point and 10 years as the hard cutoff.
To find the DOT code, look on the outer sidewall for “DOT” followed by a string of letters and numbers. The date code is the last 4 digits at the end of that string. For tires made after 2000, the format is always WWYY (week, then year).
- Example 1: “DOT … 2319” = manufactured in June 2019.
- Example 2: “DOT … 0624” = manufactured in February 2024.
- Example 3: Tires made before 2000 used a 3-digit code – those should be replaced regardless of tread.
Always check the date code before buying “new” tires – warehouse stock can sit for 2-3 years, and you’re paying new-tire prices for aging rubber.
Tread Wear Indicator Bars and Uneven Wear Patterns
Tread wear indicator bars are small raised bars that run across the main tread grooves and become flush with the tread surface at exactly 2/32 inch of remaining depth – when you can see them clearly, the tire is at the legal minimum and must be replaced.
Most drivers never look for these bars, which is a shame because they’re built right into every modern tire and don’t require a coin or gauge. They’re located at the bottom of the main circumferential grooves and look like thin, smooth ridges when new. When they appear as flat strips level with the surrounding tread, the tire is worn out.
Uneven wear patterns tell a different story – they signal a mechanical problem, not just age. Here is the diagnostic chart our shop uses:
- Center wear (middle tread bald, edges fine): Overinflation. The tire bulges in the middle and wears there first. Reduce PSI to the door-jamb recommendation.
- Shoulder wear (both edges bald, center fine): Underinflation. The tire collapses onto its shoulders. Add air and inspect for slow leaks.
- Inside-edge wear only: Alignment problem, usually camber. Get a four-wheel alignment before installing new tires.
- Outside-edge wear only: Aggressive cornering or positive camber. Check alignment and driving habits.
- Cupping or scalloping (wavy patches around the tire): Worn suspension components – usually struts, shocks, or bushings. Replace the suspension parts before the new tires.
- One-sided diagonal feathering: Toe misalignment. A wheel alignment will fix it before you burn through new rubber.
Address the root cause first – putting new tires on a misaligned vehicle just repeats the wear pattern in 15,000 miles.
When to Replace Tires: Beyond the 2/32″ Rule
Replace tires when tread depth reaches 2/32 inch by law, when it reaches 4/32 inch for safe wet-weather driving, when any sidewall damage appears, when the tire is 10 years old regardless of tread, or when uneven wear indicates a mechanical issue. In practice, most safety-focused drivers plan replacement at 4/32 inch.
There is an ongoing debate on r/tires about whether to replace at 4/32 proactively or wait for the 2/32 legal minimum. Our team’s view, based on real wet-weather stopping data: if you drive in any region that gets regular rain, the 4/32 threshold is the right call. Dry climates can stretch closer to 3/32 without measurable risk.
Here are the signs that mean “replace now,” regardless of tread depth:
- Any visible sidewall bulge. Internal cord damage is not repairable and can cause a blowout at speed.
- Vibration at highway speed that didn’t exist before, even after balancing and rotation.
- Cracks deep enough to see cord fabric (the white or nylon mesh beneath the rubber).
- Age over 10 years from the DOT date code, even with perfect-looking tread.
- Repaired puncture larger than 1/4 inch or any puncture in the sidewall.
If two of these signs show up on the same tire, replace it as a matched pair on the same axle.
After-Impact Inspection: What to Do After a Curb Hit or Pothole
After hitting a curb or pothole hard, check the tire immediately for a bulge, slow leak, or vibration – and reinspect it weekly for the next month because internal cord damage can show up as a bulge days or weeks after the impact.
This is one of the most common oversights our team sees: drivers hit a curb, glance at the rim, and assume the tire is fine because there’s no visible damage. The reality is that sidewall cords can be bruised internally and fail gradually.
Here is the post-impact checklist:
- Stop within a mile and visually inspect all four tires for bulges, cuts, or objects stuck in the tread.
- Check tire pressure on the affected wheel and compare to the other three. A drop of more than 3 PSI means a slow leak.
- Drive at low speed first and listen for vibration or thumping. Any new noise means the tire is damaged.
- Recheck pressure after 24 hours and again at one week. A slow leak from a damaged bead can take days to show.
- Have a professional inspect the tire within a week if any pressure drop or visible damage appears.
- Reinspect weekly for a month because bulges can form gradually as damaged cords separate.
If a bulge appears at any point, replace the tire before the next highway drive – this is non-negotiable.
Spare Tire and Seasonal Swap Safety Checks
Spare tires age just like regular tires and need the same monthly checks – a full-size spare should be inspected every 6 months, and a temporary “donut” spare should be replaced if it’s more than 8 years old, regardless of tread appearance.
Spare tires are the most-forgotten tires on any vehicle. They sit in trunks or under cargo floors, often untouched for the entire life of the original tires. By the time you need one, dry rot may have made it unsafe to use at highway speed.
If you swap seasonal tires (winter to summer or vice versa), inspect both sets during the swap:
- Check the DOT date code on the stored set – storage conditions affect aging rate.
- Inflate to the placard PSI before reinstalling, since stored tires lose air slowly.
- Rotate if needed so the older set moves to the rear axle, where wear is more even.
- Inspect for flat-spotting from sitting loaded in one position for months.
- Re-torque lug nuts to the manufacturer’s specification after 50-100 miles.
A spare that fails on a remote highway is worse than no spare at all – it gives you a false sense of security.
Frequently Asked Questions
At what psi do tires become unsafe?
Tires become unsafe when they fall more than 25% below the vehicle’s recommended pressure – typically around 25-28 PSI for passenger cars. Underinflation causes excessive sidewall flexing, heat buildup, and can lead to blowouts. Overinflation above the sidewall maximum (often 44 PSI for passenger tires) reduces the contact patch and makes the tire more vulnerable to impact damage. Always follow the PSI on your door-jamb placard, not the number on the tire.
How to test if tires are still good?
Run four tests: insert a penny head-first into the main tread groove (replace if you can see Lincoln’s head, meaning tread is below 2/32 inch); check cold tire pressure against the door-jamb placard; inspect sidewalls for bulges, cracks, or dry rot; and read the last 4 digits of the DOT code to confirm the tire is under 10 years old. Any failure on any of these checks means the tire is no longer road safe.
What is the 3 tire rule?
The 3-tire rule is a tire rotation guideline: to keep wear even across a full set, rotate tires so that no tire spends more time on a given axle position than any other. In practice this means moving the front tires straight to the rear and crossing the rear tires to the front. Following a regular rotation schedule (every 5,000-7,500 miles) extends total tread life by 15-20%.
Are 20 year old tires still good?
No – 20-year-old tires are not safe regardless of tread depth. Most manufacturers recommend replacement at 10 years from the DOT date code, and NHTSA suggests 6 years as the start of the replacement window. After a decade, rubber hardens and loses grip even if it looks fine, and the risk of sudden failure rises sharply. Replace any tire older than 10 years immediately.
What is the easiest way to check tire tread depth?
The easiest way is the penny test: insert a penny into the main tread groove with Lincoln’s head pointing down. If any part of his head is covered by tread, your tires are above the 2/32 inch legal minimum. If you can see the entire top of his head, the tire is at or below the legal minimum and should be replaced. For a wet-weather check, use a quarter – if Washington’s head is visible, tread is below 4/32 inch.
Is 10/32 a lot of tread on a tire?
Yes – 10/32 inch is essentially a new tire. Most new passenger tires ship with 10/32 to 11/32 inch of tread depth. At this level you have full wet and dry performance, strong hydroplaning resistance, and likely 50,000+ miles of remaining life with proper rotation. Anything above 8/32 is considered like-new condition.
Should I replace my tires at 5/32?
Not yet – 5/32 inch is still safe in dry conditions. Plan to replace at 4/32 inch if you regularly drive in rain or snow, because hydroplaning resistance drops sharply below that threshold. In dry climates you can stretch closer to 3/32 inch without measurable risk. Replacing at 5/32 inch is conservative and fine for safety, but you’re discarding 12,000-15,000 miles of usable tread.
Are 7 year old tires still safe to use?
Yes, 7-year-old tires are generally safe if they have adequate tread, no sidewall damage, and have been stored or used under normal conditions. NHTSA flags 6 years as the start of the watch window, and most manufacturers recommend replacement at 10 years. At 7 years, inspect the sidewalls for dry rot, confirm the DOT date code, and plan for replacement within the next 1-3 years.
How long are tires good for after the dot date?
Most tire manufacturers recommend replacement 10 years after the DOT manufacture date, even if the tread looks new. NHTSA suggests starting the replacement discussion at 6 years. Rubber hardens with age from UV, heat, and ozone exposure, reducing grip and raising the risk of sudden failure. The DOT date code is the last 4 digits on the sidewall – first 2 are the week, last 2 are the year.
Is 30000 miles on a set of tires good?
30,000 miles is on the lower end of typical tire life – most modern all-season tires last 50,000-70,000 miles with proper rotation. 30,000 miles may indicate aggressive driving, underinflation, missed rotations, or low-quality tires. Check for uneven wear patterns to identify the cause before installing replacements, or you’ll repeat the same early wear.
How to read tire DOT date code?
Find DOT on the tire sidewall, then read the last 4 digits at the end of that character string. The first 2 digits are the manufacturing week (01-52) and the last 2 digits are the year. For example, 2319 means the tire was made in the 23rd week of 2019. Tires made before 2000 use a 3-digit code and should be replaced regardless of tread depth.
Tire damage after hitting curb – what should I do?
Stop within a mile and visually inspect the affected tire for bulges, cuts, or embedded objects. Check the pressure on that wheel and compare to the other three – a drop of more than 3 PSI means a slow leak. Drive slowly and listen for vibration or thumping. Recheck pressure at 24 hours and again at one week, since internal cord damage can take days to show as a bulge. Replace the tire if any bulge appears.
Final Thoughts: A Monthly Check Keeps You Road Safe
Knowing how to check if your tires are still road safe comes down to four inspections every month: the penny test for tread, a pressure check against the door-jamb placard, a sidewall scan for damage, and a quick read of the DOT date code. None of these take more than a couple of minutes, and together they catch the problems that cause the majority of tire-related breakdowns.
I’d encourage you to set a recurring calendar reminder for the first Saturday of every month, walk around each car, and run the full checklist. After the second or third time, the whole routine takes under ten minutes. That ten minutes is the difference between a tire that fails on a quiet Sunday and one you replace on your own schedule.