
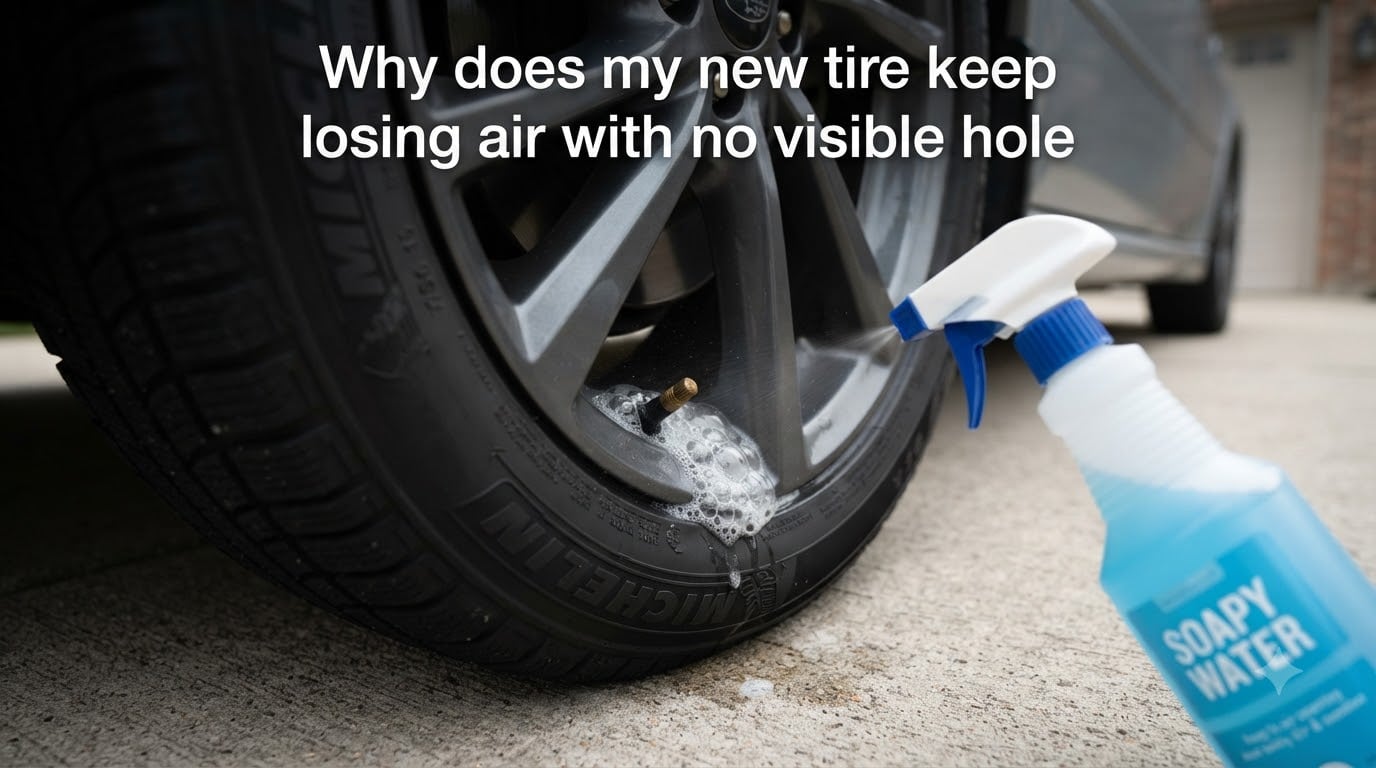
If your new tire keeps losing air with no visible hole, the most common causes are a slow leak at the valve stem, an unseated tire bead against the rim, a tiny puncture (often a nail still embedded in the tread), normal air permeation through the rubber, or a cold-weather pressure drop. Most slow leaks come from one of these five issues, and you can usually find them at home in under 15 minutes with a spray bottle of soapy water.
I have worked on hundreds of tire complaints just like this, and the frustration is real. You paid for a brand-new tire, and within days it is already asking for air. The good news: the cause is almost always one of a handful of well-known issues, and the fix is usually straightforward.
Table of Contents
Quick answer: top reasons a new tire loses air without a visible hole
- Valve stem leak – cracked rubber seal or loose valve core, often after 5-7 years of service.
- Bead seal failure – tire not seated properly against the rim, common after a pothole or curb impact.
- Hidden puncture – nail, screw, or wire still embedded in the tread, leaking around the object.
- Permeation – normal air loss through the rubber itself, averaging about 1 PSI per month.
- Cold weather drop – tires lose roughly 1 PSI for every 10°F drop in temperature.
Each of these is covered in detail below, along with a step-by-step diagnosis and a checklist for deciding whether to repair or replace.
Why does my new tire keep losing air with no visible hole
A tire that loses pressure without a visible puncture is bleeding air through one of four pathways: a small hole you cannot see (often because the puncturing object is still lodged in the tread), an imperfect seal between the tire bead and wheel rim, the valve stem assembly, or the rubber itself.
Every tubeless tire loses some air through the rubber compound, a phenomenon called permeation. Industry data puts that baseline at roughly 0.5 to 1 PSI per month for a typical passenger tire. Anything faster than that is a true leak, not normal permeation.
The trick is to figure out which pathway is the culprit. Drivers on r/cartalk report that more than half of mystery leaks turn out to be either a cracked valve stem or a slowly weeping bead seal, both of which produce no visible damage from the outside.
Start with the easiest checks first. A spray bottle of soapy water, a few minutes, and a calm driveway will solve most cases without ever paying a shop.
Cold weather and temperature-driven pressure loss
Tires lose about 1 PSI for every 10°F drop in ambient temperature. That means a tire inflated to 35 PSI on a 70°F afternoon can read 28 PSI the next morning after a cold snap, and the TPMS light will come on.
This is not a leak. It is simple physics: air contracts as it cools, so the same volume of air takes up less space at a lower temperature. The tire does not actually lose air molecules – the pressure just drops.
A cold snap causing a 3 to 5 PSI drop overnight is normal and frequently reported on r/automotive. To compensate, add 1 PSI for every 10°F below your inflation temperature when checking pressure. If you inflated at 70°F and it is now 30°F, expect roughly 4 PSI of pressure drop with no leak at all.
If the pressure keeps dropping steadily after the temperature stabilizes, or if it drops more than 1 PSI for every 10°F, you have a real leak on top of the temperature effect and should run the diagnostic steps below.
Valve stem leaks: cracked rubber and loose cores
A valve stem is the small rubber or metal stem sticking out of the wheel. It contains a spring-loaded valve core that seals air inside the tire. Both the rubber boot and the core can fail.
Rubber valve stems typically last 5 to 7 years before the rubber dries, cracks, and starts hissing air. A cracked valve stem will leak noticeably faster than permeation and is one of the top causes of “mystery” leaks reported by mechanics on r/mechanicadvice.
Symptoms of a leaking valve stem include a faint hissing sound near the wheel, visible soap bubbles when soapy water is sprayed on the stem, and rapid pressure loss when the cap is removed.
The fix is simple: replace the valve stem. Most shops do this for a few dollars during a tire rotation, and many include a new valve stem whenever they mount a new tire – which is why you should always ask whether your old stem was swapped out.
If the valve core itself is loose, a quick tighten with a valve-core tool can stop the leak. You can also dribble a little soapy water on the cap to confirm whether air is escaping around it before assuming the stem is bad.
Tire bead seal leaks and rim issues
The bead is the wire-reinforced edge of the tire that seats against the wheel rim. An air-tight seal between the bead and the rim is what holds pressure inside the tire. If that seal fails, air escapes through the gap, often without any visible mark on the tire.
Bead seal failures are common after a hard impact – hitting a pothole, a curb, or a deep railroad crossing at speed. The impact can deform the rim, knock the bead out of its seat, or crack a corroded aluminum flange. Once the seal is broken, the tire will lose air steadily.
Symptoms of a bead leak include slow pressure loss that does not respond to topping off, hissing around the rim flange (most audible when the wheel is off the ground), and visible bubbles when soapy water is run along the rim edge.
Repair involves dismounting the tire, cleaning both the bead and the rim with a wire brush, inspecting the rim for damage, and reseating the tire with a fresh bead seal. Many shops use a bead sealant paste as added insurance. If the rim itself is bent or corroded beyond cleaning, the rim must be replaced.
Yes, a tire can lose air through the rim. The rim is not airtight on its own – it depends entirely on the bead seal and the rubber rim band to hold pressure.
Permeation: the normal air loss through rubber
Permeation is the slow diffusion of air molecules through the rubber compound of the tire. Every tubeless tire loses a small amount of air this way, even when there is no leak anywhere.
Industry consensus and owner reports on BobIsTheOilGuy put normal permeation at about 1 PSI per month for typical passenger tires. Some sources cite up to 2 PSI per month as still within “normal.” Beyond that, you are looking at a real leak, not just permeation.
Permeation is the reason manufacturers recommend checking tire pressure monthly, even on brand-new tires. It is also why a tire that has been parked for several weeks – including a spare – will be flat when you finally go to use it.
You cannot stop permeation, but you can manage it by checking pressure monthly and topping off as needed. Some shops offer nitrogen inflation, which leaks through rubber more slowly than compressed air because nitrogen molecules are larger than oxygen molecules, but the difference is modest and the trade-off is rarely worth the hassle.
Hidden punctures you cannot easily see
Not every puncture is obvious. A nail or screw can lodge partway into the tread without punching all the way through, and air escapes slowly around the shaft instead of through a clean hole. From the outside, the tire looks perfectly fine – the nail just looks like a piece of debris.
These “embedded” punctures are some of the most common slow-leak causes reported by drivers. Many users on r/cartalk report finding a nail they had driven over for weeks without realizing it, all while wondering why the tire kept going soft.
The leak path can also be on the sidewall, which is harder to spot and usually cannot be repaired. Sidewall punctures, bulges, or cracking mean the tire must be replaced.
To check for embedded objects, run your hand carefully over the tread while the wheel is off the ground. Wear gloves. Pull out anything sharp only if you are comfortable plugging the tire; otherwise, leave it in place and drive slowly to a shop – the object may be the only thing slowing the leak.
Repair vs replace rule of thumb: a puncture in the tread that is smaller than 1/4 inch and not in the shoulder or sidewall can usually be plugged and patched from the inside. Sidewall damage, large holes, or multiple close-together punctures generally mean the tire should be replaced.
Why a brand new tire can lose air after installation
A new tire can lose air faster than expected when something went wrong during installation. Common install-related causes include the old valve stem not being replaced, the tire bead not being properly seated against the rim, debris left on the rim flange before mounting, or a defective tire that escaped quality control.
If your tire shop did not swap the valve stem, the old one is now the weak link. A 6-year-old valve stem on a brand-new tire will often fail within weeks, and the new tire will get the blame.
Similarly, if the rim flange was not cleaned before mounting, even a tiny pebble or corrosion flake can prevent the bead from seating fully. The tire will hold air at first, then start leaking as the imperfect seal is disturbed by driving.
A pothole impact within the first week of ownership can also knock a freshly mounted tire out of its seat. This is frustrating but it is not the tire’s fault and it is not the shop’s fault – it is bad luck, and it is exactly what road-hazard warranties are designed to cover.
If your new tire is going flat within days of installation, take it back to the shop that mounted it and ask them to verify the bead seat, swap the valve stem if they did not already, and inspect the rim flange. Most reputable shops will redo the work at no charge.
How to find a slow leak in a tire step by step
You can find most slow leaks at home in about 15 minutes with a spray bottle, dish soap, water, and a tire-pressure gauge. Here is the order I run through every time.
Step 1: Confirm the leak. Check and record the pressure, then check again in 24 hours. Anything more than about 2 PSI in 24 hours is a real leak. One to two PSI in a week is normal permeation.
Step 2: Inflate to spec. Bring the tire to the pressure listed on the door-jamb sticker, not the number on the sidewall. The sidewall number is the maximum, not the recommended pressure.
Step 3: Spray soapy water. Mix dish soap with water in a spray bottle and mist the entire tire: tread, sidewalls, and rim edges. Look for bubbles forming. Even tiny bubbles mean a leak path.
Step 4: Check the valve stem. Spray directly on the valve stem, including the rubber boot. Listen for hissing. If you see bubbles here, the valve stem is the leak. Replace the stem or tighten the core.
Step 5: Check the rim edges. Spray along both the inner and outer rim flanges. Bubbles here mean a bead seal leak. The tire must come off the rim to fix this properly.
Step 6: Check the tread and sidewalls. Run your hand over the tread for embedded nails or screws (wear gloves). Inspect both sidewalls for cuts, bulges, or cracking.
Step 7: Listen. In a quiet garage, put your ear near each wheel while the tire is inflated. A hissing sound often points to the bead or valve stem before you even start looking.
Step 8: Submerge if needed. For very slow leaks, you can remove the wheel and submerge it section by section in a tub of water. Bubbles will pinpoint the leak path. This is the slowest method but the most reliable.
If none of these steps turn up a leak but the tire keeps going flat, take it to a shop. They have diagnostic tools and a higher-volume air supply that can find leaks too slow for home detection.
Repair vs replace: when to see a tire professional
Repair the tire if the leak is a small tread puncture, a faulty valve stem, or a dirty/imperfect bead seal that can be cleaned and reseated. Replace the tire if the leak is in the sidewall, if the tire has multiple close punctures, if the tread is worn below 2/32 inch, or if the tire has been driven flat and the sidewall is damaged.
For bead seal issues, rim corrosion, TPMS sensor faults, and any leak you cannot find yourself, the right call is a tire shop. Quick same-day diagnosis beats guessing, and a free air top-off while you are there can buy you time.
If the tire was installed within the last 30 days and is going flat, return to the original installer first. Most shops stand behind their mounting work and will redo it at no charge. Keep your receipt and, if possible, the DOT date code from the sidewall.
For recurring leaks on a tire you have already paid to repair more than once, replacement is usually cheaper than another repair. A new tire costs more up front but eliminates repeat shop visits and the risk of being stranded.
Frequently Asked Questions
Is it normal for a new tire to lose air?
Yes, all new tires lose a small amount of air through the rubber itself, averaging about 1 PSI per month. Anything faster than that indicates a real leak at the valve stem, bead seal, or a hidden puncture.
How often should I check tire pressure?
Check tire pressure at least once a month, and before any long trip. Pressure should always be checked when the tires are cold – meaning the car has been parked for at least three hours or driven less than a mile.
Can a tire lose air without a visible hole?
Yes. Tires can lose air through a cracked valve stem, an unseated bead against the rim, normal rubber permeation, a cold-weather pressure drop, or a tiny puncture where the object is still embedded in the tread and sealing most of the hole.
How long can a car sit before tires go flat?
A typical passenger tire loses about 1 PSI per month from permeation alone. A car parked for 6 months will likely have at least one tire low enough to trigger the TPMS light, and a year of sitting can leave tires fully flat.
Why is my brand new tire going flat overnight?
A new tire going flat overnight almost always points to a valve stem leak, an unseated bead, or a tire that was damaged during install. A slow overnight drop can also be a temperature swing – cold nights drop pressure 1 PSI for every 10F of cooling.
Can a tire lose air through the rim?
Yes. A tire can lose air through the rim if the tire bead is not seated tightly against the rim flange, if the rim is corroded or bent, or if the rubber rim band is damaged. These leaks require dismounting the tire to repair.
Bottom line: get the leak found and fixed
A new tire that keeps losing air with no visible hole almost always has a slow leak at the valve stem, the bead seal, a hidden puncture, or is simply responding to a cold snap. Run the soapy-water test, rule out temperature, and inspect the rim edges. If you cannot find the leak at home, bring it in for a same-day diagnostic – a free air top-off buys you time but does not solve the underlying cause. Catching the leak early protects the new tread and keeps you safe on the road.